Your iPhone can play retro games originally released for the Gameboy, Nintendo 64, and more, thanks to the Delta app. Here’s how to get started.
Delta is a spiritual successor to the GBA4iOS app that originated as a project built by then-high school student Riley Testut. Apple never allowed emulation on iOS until regulations forced its hand, so now Delta has arrived officially on the App Store.
Emulation software runs on the iPhone’s CPU to simulate a game console so it can run game ROMs. These ROMs, the Read Only Memory found in cartridges and discs, can only be legally obtained by pulling them from physical hardware.
This guide is not going to tell you how to get ROMs for various systems. AppleInsider isn’t Google, and you can’t search for them here.
Once you’re in possession of a ROM, it is quite simple to get Delta up and running, but the app is filled with many settings and menus. Here’s what you need to know.
We’re going to start this out with a pretty definitive statement. We’ve got multiple staffers using this, and we all think it’s great fun. Delta is an incredibly easy and fun way to get started in emulation.
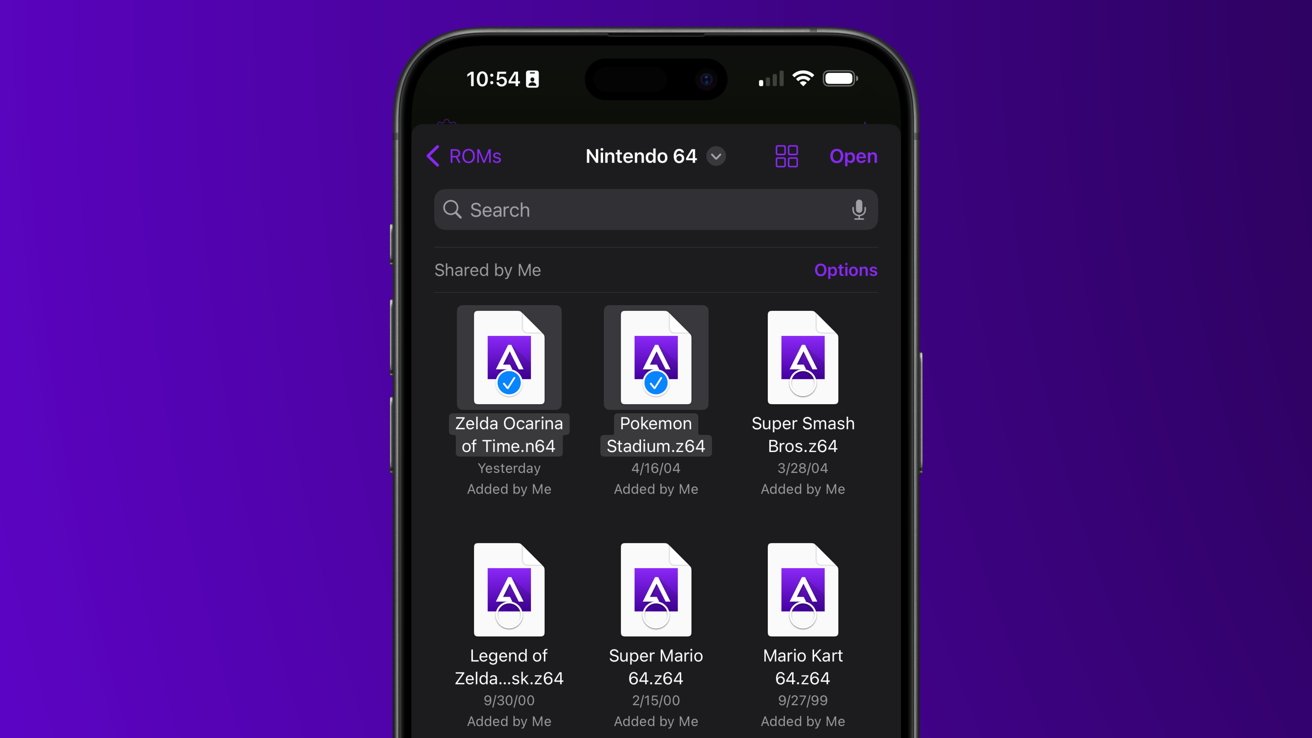
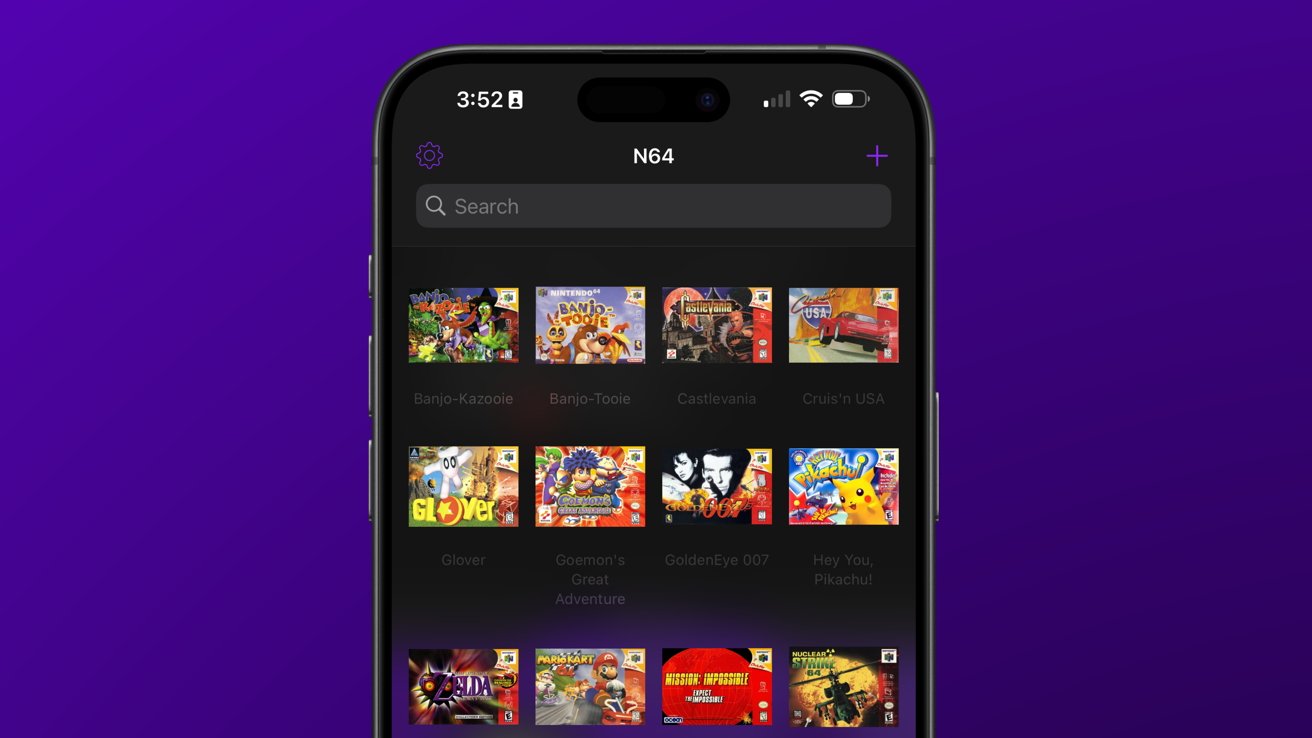
Adding a ROM to Delta
There are two methods of adding ROMs to Delta. One is via a direct add from the iPhone’s Files app, and the other is via Finder Sync on the Mac.
You’ll want to keep your ROMs in the Files app. When adding a new ROM to Delta, it’s easiest to do so from the app by pressing the “+” in the top right corner.
If, for whatever reason, your file is in a .zip file or other archive format, Delta should handle those files without issue. If an error occurs, try unarchiving the file. Apple’s Files app can handle .zip usually, but other archive types will need a third-party app.
The file you’re looking for has a somewhat obvious file extension. It’s .gbc for Gameboy color or .n64 for Nintendo 64, for example.
Delta lets you select more than one file to add at once. Select the ROMs you wish to add, then tap “Open.”
The games will join collections on separate pages depending on the console the ROM is for. Delta supports ROMs for NES, SNES, N64, Gameboy, Gameboy Advance, and Nintendo DS.
The app has hidden beta support for Sega Genesis. Adding games for this console might populate the library, but Delta won’t be able to launch these games — yet.
And if you add ROMs for unsupported systems like the original PlayStation, it could cause problems with the app’s ability to load the library. Long pressing is the only way to delete a game, but this action also plays a game launch preview in a window, which crashes the app for unsupported games.
If you ever run into issues managing your Delta library, you can always manage the games from the Files app.
Mac users that have game files available on their Mac can also sync the games to Delta via the Files Sync function. The connected iPhone will show up in Finder, and Delta is a targetable location there.
Obtaining and adding controller skins
There is a dedicated website for finding basic skins for the Delta emulator. Simply navigate to , select your console, and then pick a skin.
The skin is downloaded to the Files app. Open Delta and tap the “+” just like you’d add a new game. Select the downloaded controller skin, and it will automatically populate the app without any confirmation.
To apply the skin as the default, tap the cog icon in the top left corner, select the desired controller under the “Controller Skins” section, then tap the portrait or landscape image. This will open a scrollable list of available skins for the console in that orientation.
After selecting a skin, it will act as the default controller skin for that console unless a specific skin is set for that particular game. This is an excellent option for games with specific control styles.
If you have Street Fighter and want a layout more friendly for fighting games but only for that game, long press the game and select “Change Controller Skin.” For just that game going forward, that skin will be applied.
There are some wild skins out there that take advantage of the fact the iPhone is a touch device, and buttons can go anywhere. The Nintendo DS is especially interesting here because different skins can prioritize different displays.
Remapping physical controller buttons
If you’ve decided to use a physical controller like one from Backbone or GameSir, Delta has options for you as well. Skins don’t appear when a controller is connected, so there’s no falling back to touch, except for the DS bottom screen.

That can be an issue if you’re playing a game and a controller doesn’t necessarily have a “Start” button. Delta has some decent default configurations, but it is best to map buttons in a way that makes sense for you.
To map your physical controller, tap the cog icon in the top left of Delta and select the controller you wish to edit. The first controller you attach should be under “Player 1,” then tap “Customize Controls.”
You’ll be presented with the NES button layout at first. This and most of the other console buttons should be in the best configuration depending on your needs, but the Nintendo 64 is the one you’ll definitely want to edit.
Tap “NES” to open a dropdown menu, then tap “N64.” To remap a button, tap the desired button, then press the physical button on the controller to map it.

For example, the “Z” button would be best set on the “L2” button for most controllers since it corresponds to where the “Z” button is in Zelda: Ocarina of Time when navigating that game’s options menu. The “A” and “B” buttons are actually in the incorrect configuration in the digital controller, so if you want them to match the real N64 controller, you will want to map those to the bottom and left-face buttons, respectively.